Shop apron
A full work apron with a bib, crossed back straps, three pockets cut from one piece, and one cord that sets the waist. Drafted by the USDA in 1944 and revised in 1952. Pick a layer below, then print it or download the cut file.
From the public record: Dresses and Aprons for Work in the Home, Farmers' Bulletin No. 1963, 1944, revised 1952.
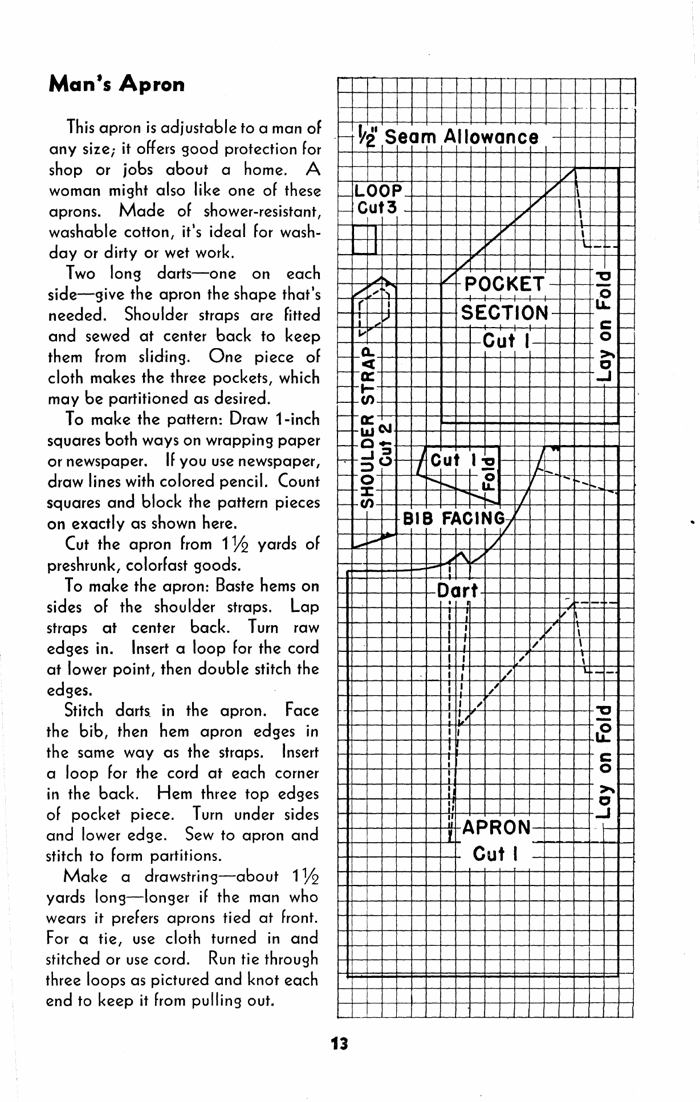
Exactly as the USDA printed it. Draw 1" squares on paper and copy each piece square by square.
The same apron with 7 gaps in the 1952 sheet filled: grain, hems, pocket placement, and yardage for 45" and 60" goods. Each fix gives its reason.
The same apron in 9 to 10 oz cotton duck, with webbing straps, bound curves, bar tacks, brass grommets, and a full-size cut file for a plotter, laser or projector.
The draft
Material
1 1/2 yards of 36-inch goods. ½" seam allowance included. Cord about 1½ yards.
The 1952 text
This apron is adjustable to a man of any size; it offers good protection for shop or jobs about a home. A woman might also like one of these aprons. Made of shower-resistant, washable cotton, it’s ideal for washday or dirty or wet work. Two long darts—one on each side—give the apron the shape that’s needed. Shoulder straps are fitted and sewed at center back to keep them from sliding. One piece of cloth makes the three pockets, which may be partitioned as desired.
- To make the pattern: Draw 1-inch squares both ways on wrapping paper or newspaper. If you use newspaper, draw lines with colored pencil. Count squares and block the pattern pieces on exactly as shown here.
- Cut the apron from 1½ yards of preshrunk, colorfast goods.
- To make the apron: Baste hems on sides of the shoulder straps. Lap straps at center back. Turn raw edges in. Insert a loop for the cord at lower point, then double stitch the edges.
- Stitch darts in the apron. Face the bib, then hem apron edges in the same way as the straps. Insert a loop for the cord at each corner in the back. Hem three top edges of pocket piece. Turn under sides and lower edge. Sew to apron and stitch to form partitions.
- Make a drawstring—about 1½ yards long—longer if the man who wears it prefers aprons tied at front. For a tie, use cloth turned in and stitched or use cord. Run tie through three loops as pictured and knot each end to keep it from pulling out.
What was fixed
Cut layout
Material
| Goods | Buy |
|---|---|
| 45" wide | 1 1/2 yards |
| 60" wide | 1 1/2 yards |
Plus 54" of cord. Yardage is a straight-line layout of every piece; nothing is folded or rotated.
Sewing
- Lay out every piece with its grain line parallel to the fold.
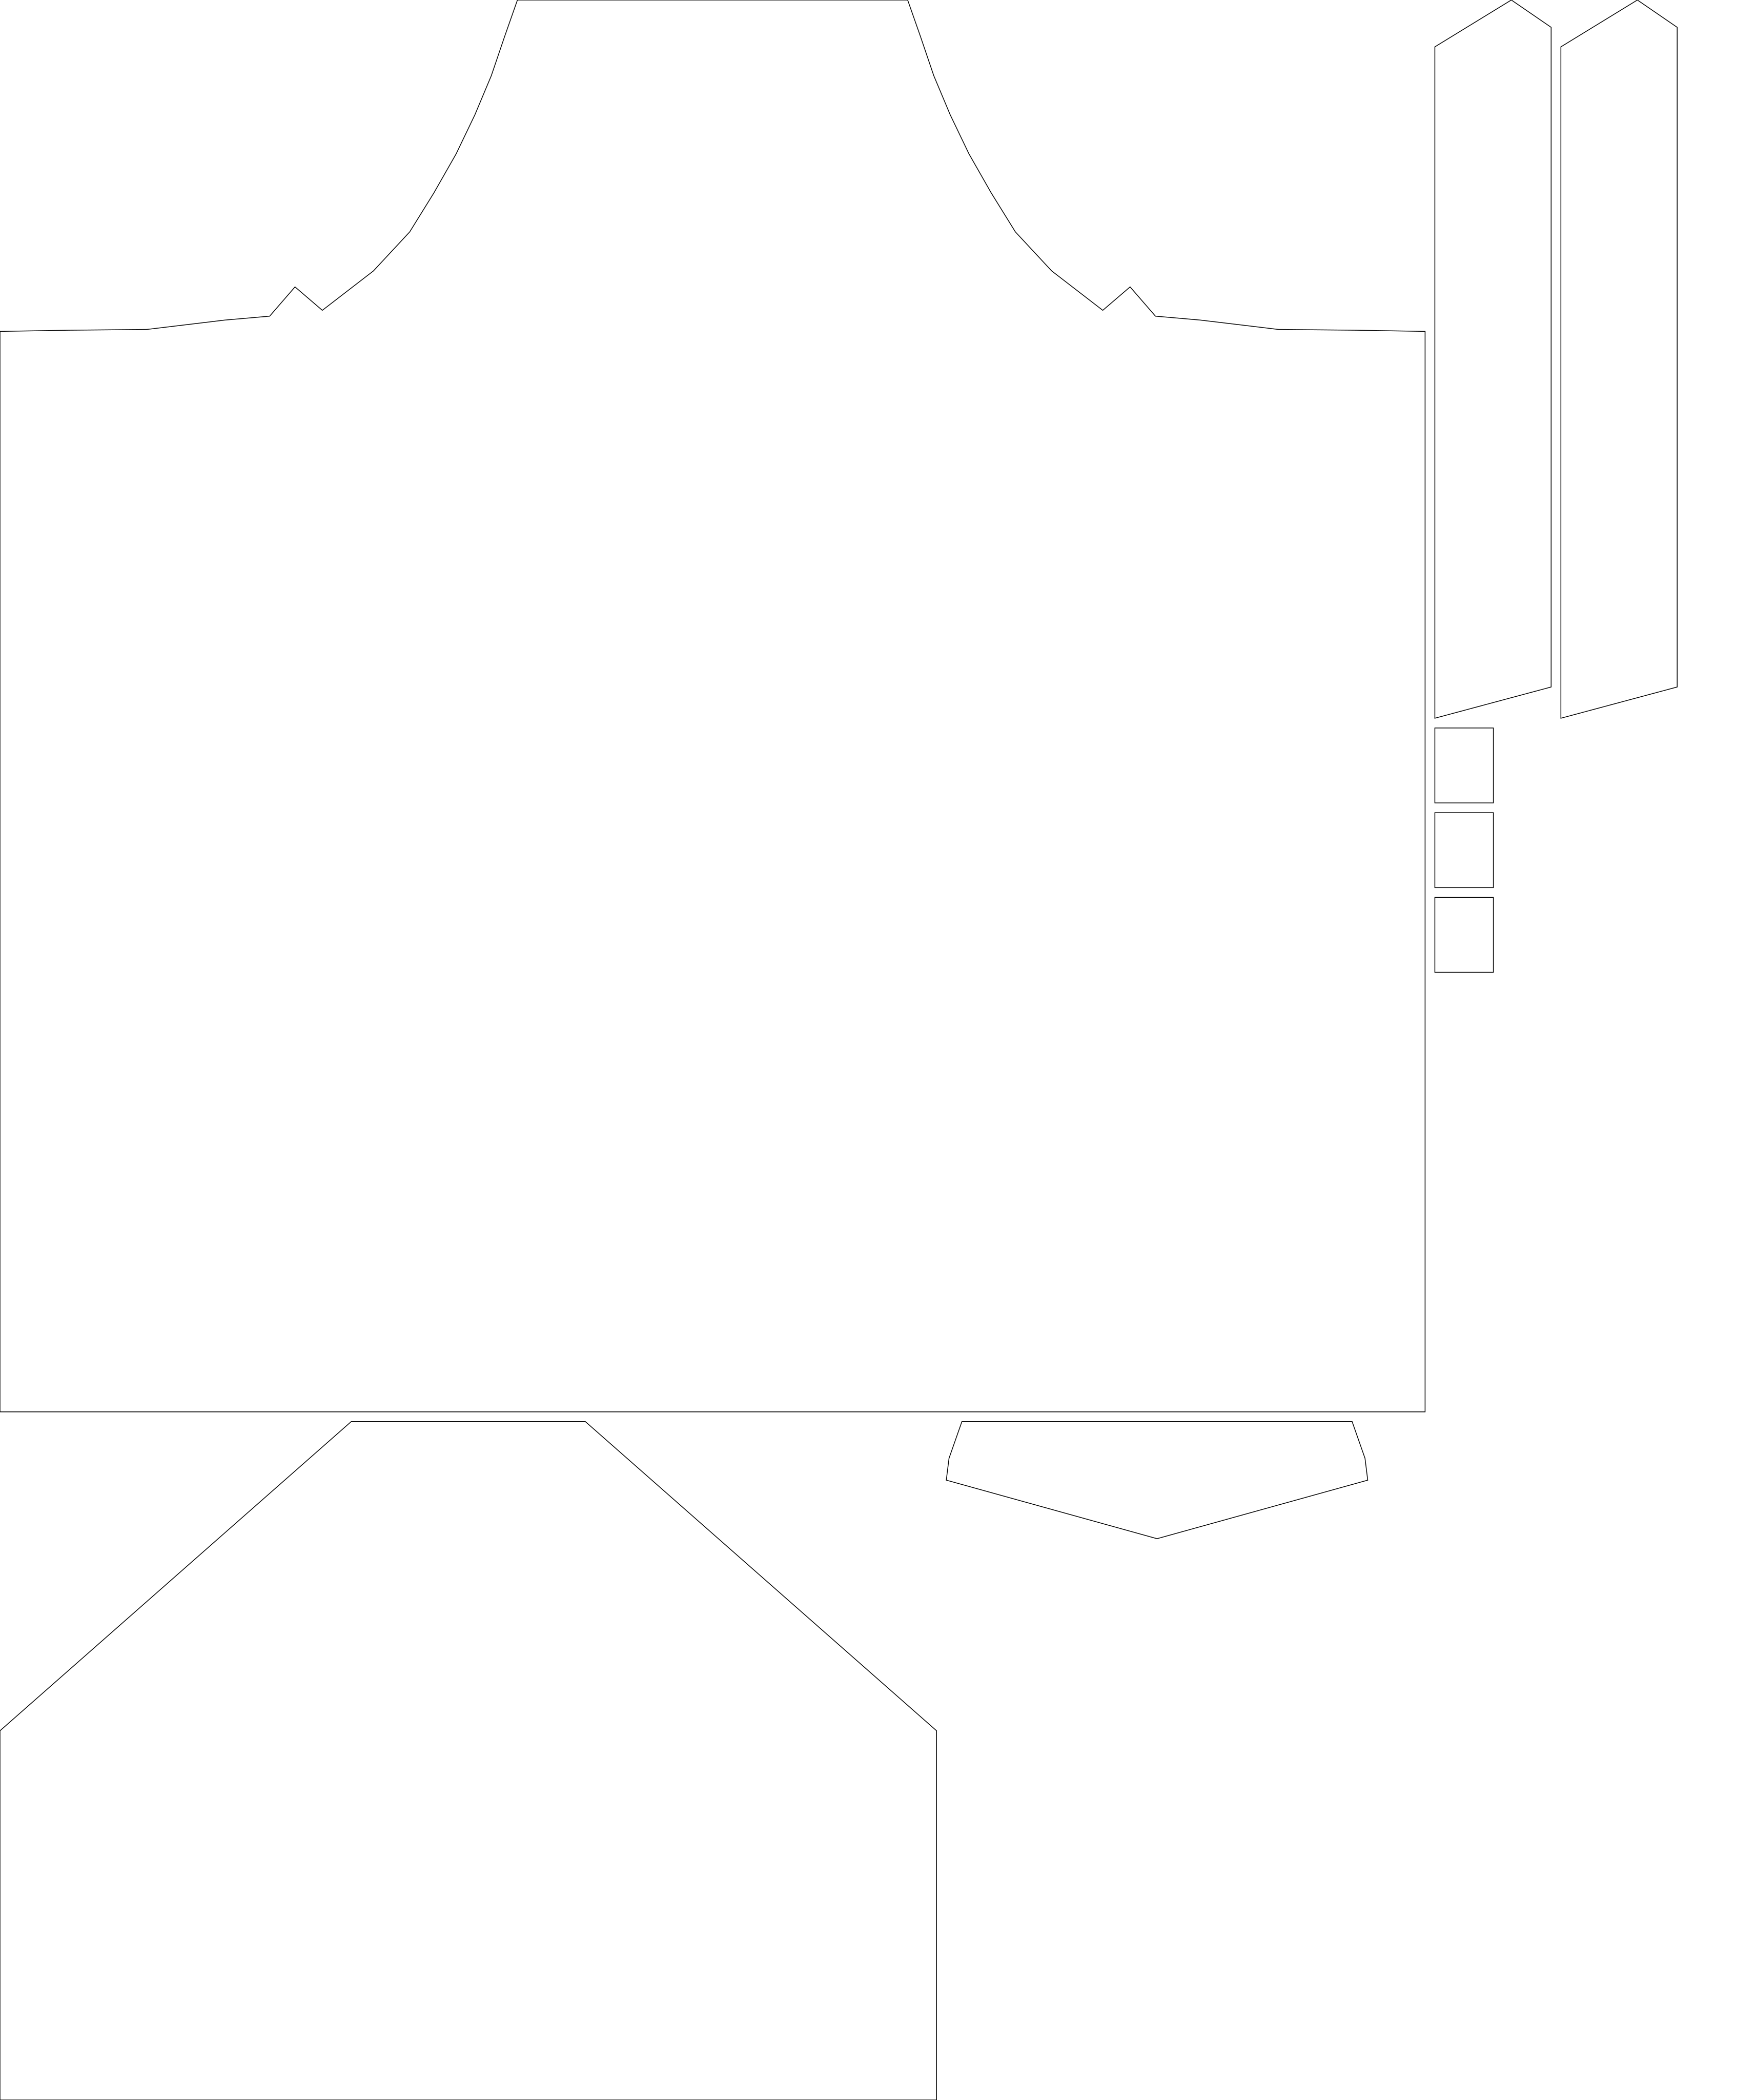
- Cut the APRON, POCKET SECTION, BIB FACING, two SHOULDER STRAPS and three LOOPS from the full-size cut file. Without a printer, draw a 1" grid on paper and copy each piece square by square, as in 1952.
- Hem both long sides of each SHOULDER STRAP with a double-fold hem: turn the ½" allowance under ¼", turn it ¼" again, press toward the wrong side and stitch close to the inner fold. Two turns hide the raw edge.
- Fold each LOOP in thirds along its length so the raw edges are hidden, and stitch it closed.
- Lap the pointed ends of the two straps at centre back as marked, with one loop folded in half and tucked under the lower point.
- Stitch the lap twice, through the loop.
- Fold each dart on the APRON right sides together so its two edges meet.
- Stitch each dart from the edge to the point. Sew the last ½" right on the fold, then tie the threads instead of backstitching, so the point lies flat.
- Press each dart toward the side.
- Pin the BIB FACING to the bib top, right sides together, and stitch with a ½" seam.
- Turn the facing to the wrong side, press the seam flat along the edge, and stitch the facing down.
- Hem the armholes, sides and lower edge with the same double-fold hem.
- At each back corner, tuck a loop under the hem fold and stitch through it.
- Hem the three top edges of the POCKET SECTION with the same double-fold hem.
- Press the pocket’s sides and bottom ½" to the wrong side.
- Pin the pocket to the apron on the placement line and stitch close to the sides and bottom.
- Stitch the two partitions, 4" either side of centre, from the pocket bottom to its top edge.
- Cut 54" of cord, or make a tie from a strip of cloth turned in and stitched.
- Thread the cord through the three loops and knot each end.
Cut files

What changed
Cut layout
Material
| Item | Amount |
|---|---|
| Cotton duck, 9 to 10 oz, 58/60" wide | 1 yard |
| Cotton twill tape, 1" | 2 yards |
| Cotton webbing, 1" | 1 yard |
| Brass grommets with washers | 4 |
| Cord | 54" |
Sewing
- Lay out the APRON and POCKET SECTION from the cut file on 9 to 10 oz duck, 58/60" wide, grain parallel to the fold. This layer has no facing, no loops and no cloth straps.
- Cut the two pieces.
- Cut two 18" lengths of 1" cotton webbing for the STRAPS.
- Seal each cut end of the webbing with a close zigzag so it cannot fray.
- Cross the straps at centre back, where the 1952 points lapped.
- Box-stitch the crossing: stitch a square, then both diagonals, so the load spreads across it.
- Set a grommet 1" up from each strap’s lower end.
- Sew the darts as in the Fixed layer: edge to point, threads tied, pressed toward the side.
- Bind the bib top and both armholes in one run: fold the 1" twill tape over the raw edge, half on each side, and stitch close to the tape’s edge.
- Hem the sides and lower edge with a double-fold hem: the ½" allowance turned ¼" twice, pressed toward the wrong side.
- Set a grommet in each back corner.
- Hem the three top edges of the POCKET SECTION the same way.
- Press the pocket’s sides and bottom ½" to the wrong side.
- Pin the pocket on the placement line and stitch close to the sides and bottom.
- Stitch the two partitions.
- Bar tack the six marked points.
- Thread 54" of cord through the four grommets and knot each end.
Cut files

Source
Dresses and Aprons for Work in the Home, Farmers' Bulletin No. 1963. Clarice L. Scott, Bureau of Human Nutrition and Home Economics, U.S. Department of Agriculture. 1944, revised 1952, pages 12 and 13, “Man’s Apron”. A work of the U.S. federal government, so it carries no copyright (17 U.S.C. 105). The bulletin at the Internet Archive.
The 1952 grid was measured square by square from the scan, to about ⅛". Changes marked “graded when built” have not been sewn and tested yet.